

How To Make Text Into A Heart Shape In Corel Draw
By Ariel Garaza Diaz
In this written tutorial, yous will learn how to create a Valentine's Day card in CorelDRAW. Ariel walks you through each stride of the pattern, showing you some not bad tricks that you can apply to create your own homemade, romantic card. Swoon!
Let'due south create a Valentine'due south Solar day menu, and of course, in the spirit of the celebration, our design will accept hearts — a lot of hearts.
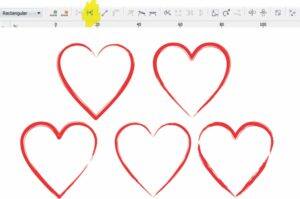
Drawing a center with CorelDRAW® is very easy. I merely click theBasic Shapes tool and, on the holding bar, cull the eye shape from thePerfect shapes picker.
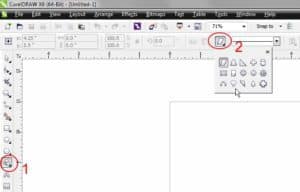
I can hold downwardCtrl when I drag on the folio to create a proportional heart, or hold downwardlyShift to create a centered heart. Naturally, I could create a middle shape past using two circles and 1 triangle, and and so welding the three shapes, just why do all that work when using a perfect shape is and then quick and piece of cake?

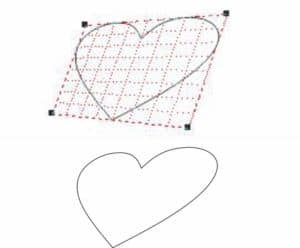
Now, I have the basic heart shape. At that place are many ways I can modify information technology; for example, I can add perspective by clickingEffects > Add Perspective and adjusting the perspective filigree. I could also use theEnvelope tool to create similar furnishings. When you create your card, apply your imagination. There are infinite ways to create a unique and original design with CorelDRAW. This tutorial is non meant to be repeated step-by-step, merely to serve as a starting betoken and guide.
To add more diverse middle shapes, I select one of the hearts and pressCtrl + Q to catechumen information technology to curves. Then, I clickWindow > Dockers > Fillet/Scallop/Chamfer and apply a fillet with an advisable radius value. For this case, I've applied 5 mm and vii mm fillets.

Now, I'll utilise theCreative Media brushes to add together a custom outline. I can arrange brush settings from the property bar, but I like to use theArtistic Media docker (Furnishings > Creative Media) because I can drag a castor shape from the docker to the drawing window.
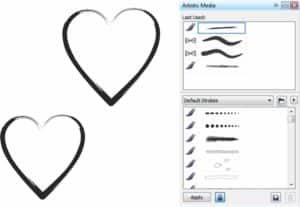
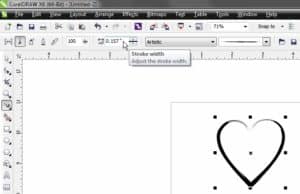
Experiment with different brushes and settings. For case, you can change the width of the brush by specifying a value in theStroke width box on the property bar. Y'all can use the aforementioned shape and create different furnishings but by changing the castor.

At present, it's time to add some color to the hearts. I can add colors simply every bit I would with any object, past clicking whatever colour swatch to fill an object, or right-clicking whatsoever color swatch to utilize an outline color.

Now, I spread out the hearts over the drawing page.
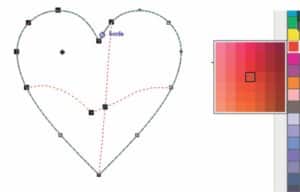
At this point, I tin can start adding some brightness to the hearts. TheMesh Fill tool is a personal favorite and very useful for this purpose. When you offset using theMesh Fill tool, information technology can seem daunting, so information technology's best to start with simple objects (a rectangle, for instance).

As for this heart, I only need to add a node and then conform the colors. I can add together color by selecting the nodes I want then choosing color swatches from the default color palette. If I want the darkest shade of a detail color, I click and hold on that swatch for several seconds, until a new secondary palette appears. I can cull a different shade from that secondary palette.
After I've added some effulgence and color to a couple of hearts, I add together them to the Valentine's Twenty-four hours carte drawing page.

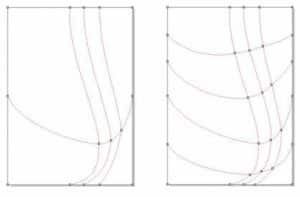
Now, I tin can use theMesh Fill tool over again to create a background for the carte du jour. Here I've used like shades of colors, but that's not a rule. You lot can utilize whichever colors you prefer, but go on in mind that you want colors that complement the chief drawing. If the background is too dark or uses too many colors, then the text or imagery might be less visible. For this example, I've created a rectangle approximately 106 mm wide and 144 mm loftier, and then added a simple mesh make full past pressing theThou primal and moving the heart node.
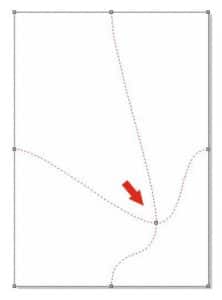
Next, I adjust the handles of the nodes to create smoother mesh grid lines.
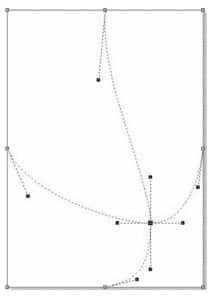
I add together more nodes by double-clicking with theMesh Fill tool at whatsoever point to create additional custom columns and rows for the mesh grid.
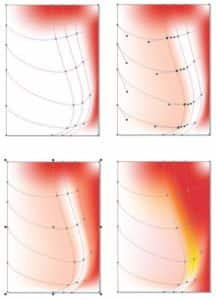
With all those adjustments made to the mesh make full grid, information technology'south now ready for some color. To add color, I use theShape tool (F10) to select some nodes. I concentrate commencement on the perimeter of the mesh make full filigree and work inward. To produce a shine color shade, I hold downCtrl and click a swatch on the default color palette. With this method, I add together x% of the selected colour tone each fourth dimension I repeat the action. I added shades of red and eventually a touch of yellowish to the eye cavalcade.
At this bespeak, I tin add the previously created hearts to the background. It's a adept idea to utilise layers here, which volition make it easier to go back and modify the groundwork if necessary. I've put the mesh-filled hearts on one layer, the Artistic Media hearts on another layer, and the background on a third layer. Of grade, you may choose to organize your job however you lot adopt.

I nonetheless demand a few more hearts for the groundwork. Instead of simply duplicating several hearts, I can use a little trick to copy only the shadows of some hearts. How? It'south easy. Get-go, I add a drib shadow to the initial perfect shape centre and change its color to carmine. Then, on the holding bar, I motion theDrop shadow opacity slider to 100 and cullOutside from theFeathering direction listing box.

Now, I intermission apart the drop shadow (Ctrl + K), so I can delete the original shape. I will use only the drop shadow with transparency. I chooseMultiply from theMerge mode listing box on the property

The next step is to apply theTransparency tool to make a translucent heart within a xanthous rectangle. I duplicate the heart several times, changing object club and rotation. You tin can utilise your inventiveness here to produce new options and effects. Try selecting one of the translucent hearts with theTransparency tool and choosingSeparate from theMerge mode listing box on the property bar.

I've added some of the new, translucent hearts to the main cartoon.

Before finalizing the card, let's add some text and brand a few more modifications of the shapes and colour. Your options are virtually limitless, so you lot can hands create unique effects. Utilise your imagination to requite the card your own personal style.


Source: https://learn.corel.com/tutorials/how-to-create-a-valentines-day-card/
Posted by: grantficame.blogspot.com
0 Response to "How To Make Text Into A Heart Shape In Corel Draw"
Post a Comment